How To Organize Photos in Lightroom Using Smart Collections
My Lightroom Catalogue was such a mess few days ago.. And my backups weren't really up to date and after reading some horror stories on loosing your images I wanted to make this my priority number uno. It's not a sexy task, but definitely something I had to do.
The Collections and Folders were unorganized and was literally scattered all over the place. So I decided to go on and manage my photos and build up a system because I really want to backup my photos regularly, and don't want to include unnecessary photos in those backups.
I know there are lot of different ways to do organizing. I believe this works for people who are not organized or have always just imported their photos anywhere where is space left in their hard drives. Here is couple of tricks I found easy and working well for my purposes.
1. Create a Collection Set
First thing to do is create a set where you will be having all the images from one year. Click on the small + sign in the Collections Panel and choose Collection Set. Name this what ever year you are going to create. For example I named it 2009.

Add Year by Creating a Collection Set
2. Create Smart Collection for a Year
Click on the right mouse button inside the Collection Set you just created and click Create a Smart Collection. Name it All and click on the Inside a Collection Set and choose the set you just created. Check Capture Date from the Rules Panel and check "is in the range" and provide the dates you want the images to be, for example 2009-01-01 to 2009-12-31 and click Create.

Create First Smart Collection with ruling.
3. Create Smart Collection for a Month & File Type
This time use the same criteria but change the time line to 2009-01-01 to 2009-01-31. And after this lets add another rule File Type is Raw or JPG. (Which ever you prefer to shoot). This is not necessary, but I really enjoy just see the RAW files without all the other TIF files etc.
Now when you have your first month set, go ahead and create all the rest months of the year, only changing the month dates.

Adding the month Smart Collection
4. Create Smart Collections for Other File Types
Now this is where I really had an aha moment. I have always been annoyed how many JPG copies I had all over the place so I just simply created a JPG Smart Collection by using The whole year Dates as previously in the Year part of this tutorial. I also did this part for TIF files to see how many duplicates I would have for the same photos. This is how you will be able to delete all the unnecessary duplicates. Just select the unnecessary duplicates and hit X and go to All Photographs and use CTRL (CMD) + Backspace and Delete from Disk. Of course be careful not deleting the files you don't want to.

Here is an example on adding JPG -files from the year into one Smart Collection
5. Copy Collection Settings
So you have now created a one year Collection system. Create another Collection Set and name it "2010". Select the Smart Collections you just created for the another year and hit ALT (Option) + and drag the Smart Collections to 2010 and voila you have almost setup another year.. Now just double click on those copied Smart Collections and edit the dates to match the year you chose to create. Do this step to all the years you want to create and you are done with the Collections.
Drag the Created Collections to new Collection Set by holding down the CTRL (CMD) - key
6. Create Folder System From The Collections
After creating a Collections you can easily use them to create folders. Just click on the first Collection you want to create a folder and use shortcut CTRL (CMD) + A to select all photos inside that Smart Collection. Now go to your hard disk drive you are going to build the folders and select with your mouse right button and Create Folder. Name it for example 01, set it to Include selected Photos and now your files are being transferred to this location, no matter on where the images were before.

Adding the Folders from Smart Collections.
If you don't want to do all these steps, you can easily just apply this how you want to organize your photos. And of course you can go even further with the management by adding Collections for events, trips etc.
Now after I have this system up, I can easily backup the whole Folder System to another Hard Drive.
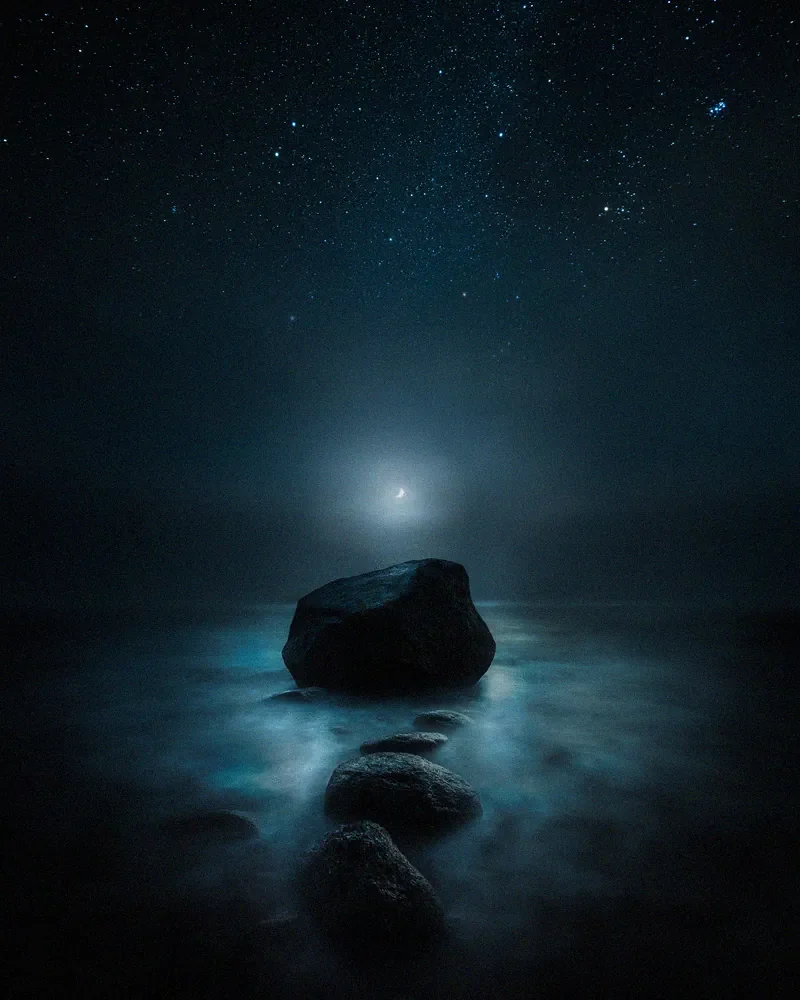
Mikko Lagerstedt - Lost
And for anyone who wanted to see some photo here is one from 2012, I ran into while going through the photos. It's supposed to get colder in the next few days so I'm just waiting for views like these!
UPDATE: Thanks to Matt for pointing out a shortcut not working.